How to remove a background from an image using popular editing tools


TL;DR
- Explains the evolution from manual Pen Tool to one-click AI matting
- Distinguishes between basic clipping and advanced semi-transparent image matting
- Provides a decision framework for choosing tools based on image complexity
- Compares top industry heavyweights like Canva, Adobe Express, and Remove.bg
- Offers techniques to preserve fine details like hair and smoke
How to Remove a Background from an Image (Without Losing Your Mind)
You have exactly 50 milliseconds to make a first impression. That’s it.
The human brain processes visuals about 60,000 times faster than text. If your product photo has a cluttered, messy background, it’s not just ugly—it’s an engagement killer. Whether you’re listing a sneaker on Amazon or polishing a LinkedIn header, the subject needs to pop. The background needs to vanish.
Historically, this was pure torture. If you were a designer back in 2015, you probably still have nightmares about the Photoshop Pen Tool. You’d spend hours clicking tiny anchor points around a model’s frizzy hair, only to end up with a cutout that looked like it was hacked apart with safety scissors.
Welcome to the 2026 reality. The grunt work is dead.
Today, background removal isn't about manually erasing pixels; it’s about intelligent "Image Matting." We’ve entered the era of One-Click AI that doesn't just cut; it understands. It knows the difference between a solid shoulder and a translucent strand of hair. But with dozens of tools claiming to be the "best," which one actually delivers a clean edge without costing a fortune?
Let's pit the heavyweights against each other—Canva, Adobe Express, and specialized AI—and show you exactly how to fix the amateur mistakes most software leaves behind.
How Does AI Background Removal Actually Work?
To pick the right tool, you need to understand why most of them fail.
Early background removers used a technique called Clipping. Imagine taking a pair of digital scissors and cutting a hard line around your subject. This works fine for a shoebox or a smartphone. It fails miserably for anything organic. If you use a "clipping" tool on a Golden Retriever, you’re going to chop off the fur details, leaving the poor creature looking like a piece of cardboard.
Modern tools use Image Matting.
This is where the AI separates the image into three layers:
- The Foreground: Opaque (your subject).
- The Background: Transparent (the stuff you hate).
- The Unknown: Semi-transparent.
The "unknown" region is where the magic happens. These are the pixels that contain both the subject and the background—think smoke, glass, or flyaway hair. The best tools in 2026 don't just delete the background; they calculate the alpha transparency of these edge pixels to preserve the softness of the original image.
So, how do you choose? Use this simple framework:
Top Tools for Background Removal in 2026
We tested the market leaders against three criteria: Speed (how fast is the render?), Edge Detection (does it butcher hair?), and Resolution (can you actually print the result?).
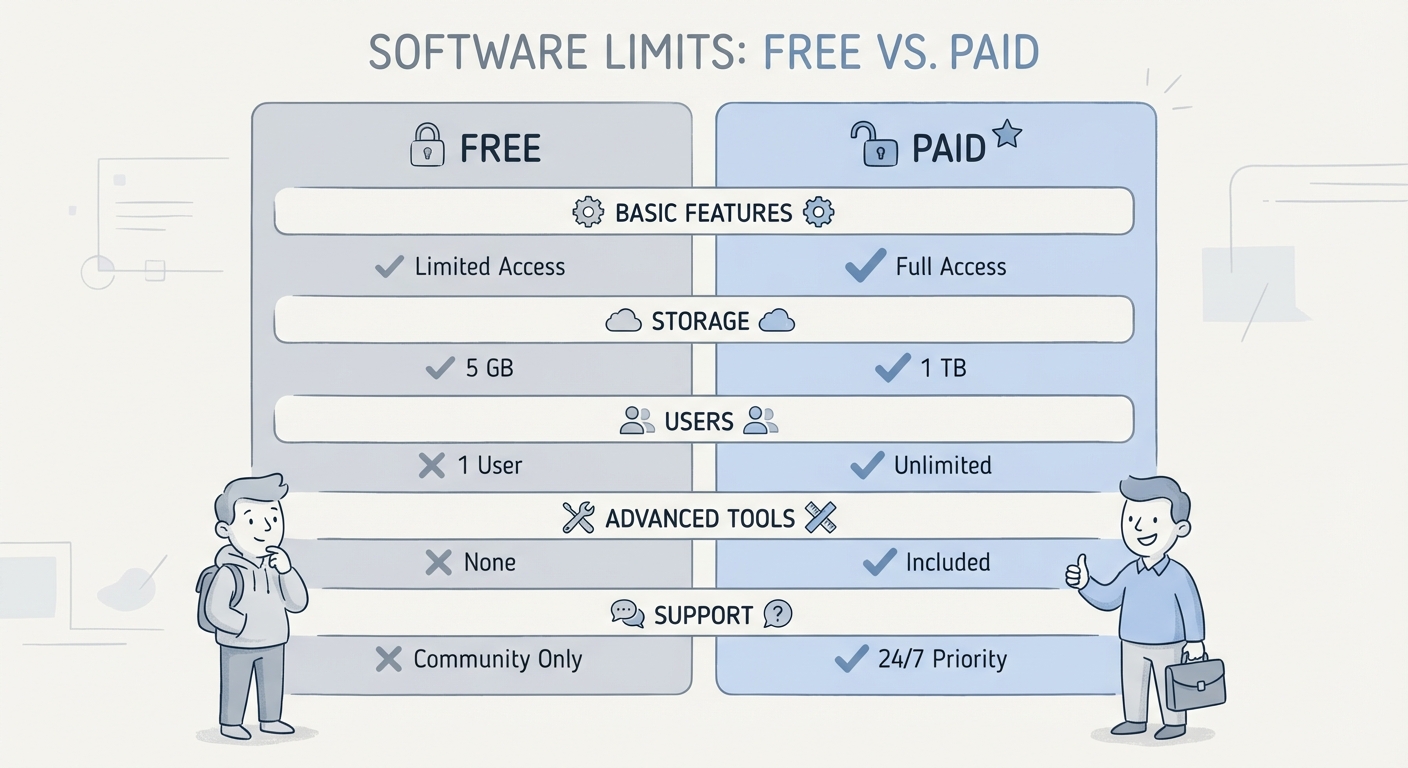
1. Adobe Express (The Best "Free Forever" Option)
Adobe realized years ago that not everyone can afford a monthly Creative Cloud subscription, but everyone wants Photoshop-quality masking. Their answer? The Adobe Express Background Remover.
It runs on the same enterprise-grade algorithms as Photoshop. The difference here is the "Matting" engine. While other free tools struggle with those "unknown" pixels we talked about, Adobe Express excels at separating fine details. It handles curly hair and transparent glass better than almost any other browser-based tool.
The best part? You can download a high-quality PNG without pulling out your credit card. It is the gold standard for free users who refuse to compromise on resolution.
2. Canva (The Marketer’s Favorite)
Canva isn't just a removal tool; it's a workflow ecosystem. If you’re a social media manager, you don't want to download a file, remove the background, re-upload it, and then place it in a template. You want it all in one place.
The Canva Background Remover is integrated directly into the editor. Note that this is usually gated behind the "Pro" or "Teams" subscription. It’s perfect for speed. You click a button, the background disappears, and you immediately drop the cutout into an Instagram Story or LinkedIn carousel.
Does it have the granular control of Adobe for complex fur? Maybe not. But for 95% of marketing assets, it is the most efficient route.
3. Remove.bg & Specialized AI (The Bulk Solution)
Sometimes you don't have one image; you have three thousand. If you’re running an e-commerce store with new inventory arriving daily, clicking "edit" on every single photo is a waste of human life.
This is where specialized tools like the Remove.bg API dominate. Developers and large e-commerce brands use these APIs to automate the entire pipeline. You feed a folder of raw product shots into the system, and it spits out thousands of clean, white-background images in minutes.
It’s a paid solution, usually charging per image credit, but the time saved on manual editing pays for itself instantly.
Step-by-Step Tutorials: The Giants
You’ve chosen your weapon. Now, here is the most efficient way to wield it.
How to Remove Background in Canva
- Upload and Select: Drag your image onto the canvas. Click it so the purple outline appears.
- The Magic Button: In the top toolbar, click Edit Photo. On the left panel, hit Magic Eraser / Background Remover.
- Refine the Mask: AI isn't perfect. If it accidentally erased a logo or a finger, click the Restore brush to paint those pixels back in. Conversely, use the Erase brush to wipe away any floating debris the AI missed.
- Context Check: Before you export, ensure your canvas dimensions are correct. Check our guide on Social Media Image Sizes to avoid pixelated posts.
How to Remove Background in Adobe Express
- Access Quick Actions: You don't even need to open a full project. Go to the "Quick Actions" menu on the home page.
- Upload: Drop your JPG or PNG file into the upload zone.
- Auto-Process: There are no buttons to click here. The tool automatically detects the subject and runs the matting process.
- Download: Once the checkerboard background appears, hit Download. Always choose PNG (Transparent) to keep the background clear.
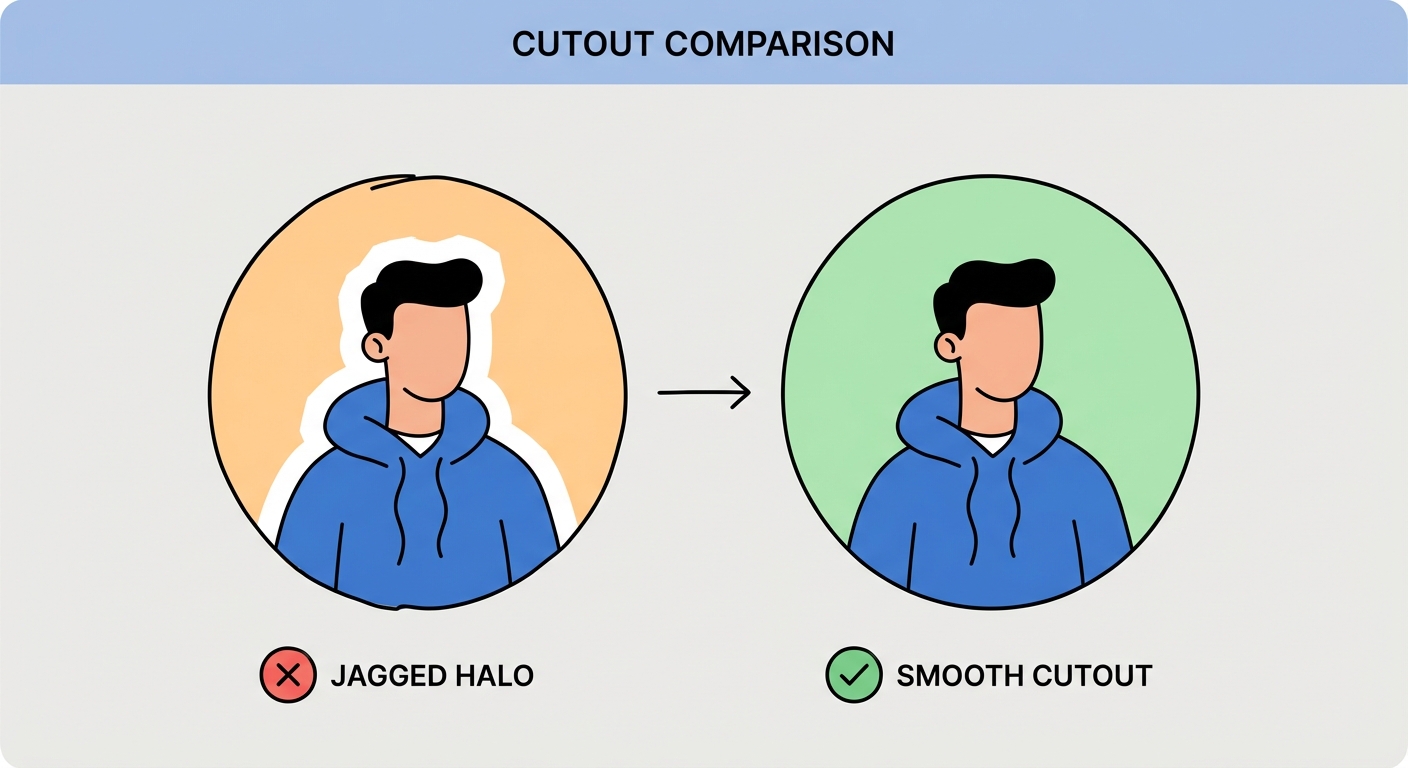
Advanced Troubleshooting: Fixing the "Halo Effect"
This is the secret sauce that separates pro designers from amateurs.
You’ve removed the background. You place your subject on a dark backdrop. Suddenly, you see it: a thin, jagged white line wrapping around your subject like a radioactive glow.
This is the Halo Effect. It happens because the anti-aliasing pixels from the original light background are still clinging to the edges of your subject. Most tutorials ignore this. We won't. Here is how you fix it:
- Method 1: Defringe (The Pro Move): If you are in a tool like Photoshop or Affinity, look for a "Defringe" or "Remove White Matte" filter. It automatically recolors those white edge pixels to match the subject.
- Method 2: Inner Glow (The Cheat Code): In tools like Canva or simple editors, add an Inner Shadow or Inner Glow effect to your cutout. Set the color to black (or a dark tone matching the subject), set the blur low, and the transparency high. This "chokes" the edge, hiding the white halo inside a subtle shadow.
- Method 3: The Manual Feather: Use a soft eraser brush at 50% opacity and gently run it along the perimeter of the hair or clothes. It blends the harsh edge into the new background.
E-commerce & Bulk Processing Strategy
If you are selling online, your background choice isn't an artistic preference; it's a compliance issue.
Platforms like Amazon and Google Shopping require pure white backgrounds (RGB 255, 255, 255). If you upload a lifestyle shot as your main image, your listing can be suppressed.
Consistency builds trust. When a customer scrolls through a collection page, they want to see products, not a chaotic mix of gray walls, kitchen tables, and bedsheets. According to Shopify Image Guidelines, maintaining a uniform aspect ratio and background style is critical for conversion.
The Workflow Hack: Shoot for the Edit Don't just rely on software. Help the AI help you. When taking product photos, use a background that contrasts heavily with your product.
- Selling a white sneaker? Do not shoot it on a white wall. Shoot it on black or green paper.
- Selling a dark wallet? Shoot it on white.
This high contrast makes it infinitely easier for the AI to detect the edges later. For more on styling, read our Product Photography Guide.
Mobile vs. Desktop: Where Should You Edit?
We live on our phones, but should we edit on them?
Mobile Apps: Fantastic for speed. If you are at an event and need to post an Instagram Story immediately, using the mobile version of Canva or Adobe Express is the right call. The screens are small, so minor imperfections in the edge detection won't be noticeable.
Desktop/Browser: If this image is going on a website homepage, a printed flyer, or a permanent product listing, put the phone away. You need the precision of a mouse and a large monitor to spot artifacts and halos.
A Note on Privacy: Be careful with "free" online tools that you've never heard of. When you upload a photo to a server for processing, you are technically handing that data over. While trusted giants like Adobe and Canva have strict enterprise security, that random "FreeBackgroundRemover2026.com" site full of pop-up ads might not. Never upload photos of IDs, credit cards, or sensitive family moments to unknown servers. Stick to local software or reputable brands.
Conclusion
Background removal has evolved from a billable hour to a millisecond task. The technology is no longer the bottleneck—your creativity is.
For the absolute best quality without a subscription, use Adobe Express. For the smoothest social media workflow, stick with Canva. And if you have a warehouse full of products, pay for a bulk API like Remove.bg.
Now that you have a clean subject, don't just leave it floating in a white void. Design is about context. If you need help building a layout around your newly cut-out subject, check out our review of the Best Design Tools for Beginners to take the next step.
Frequently Asked Questions (FAQ)
1. How do I remove a background without losing quality? Avoid sketch "free" tools that cap your download resolution at SD (Standard Definition). Many bait you with a free removal but charge you for the HD download. Use reputable tools like Adobe Express that allow high-quality PNG exports for free, or professional desktop software like Photoshop. Always export as PNG, not JPG—JPGs can't handle transparency and will fill the background with white.
2. Can I remove the background from a logo for free? Yes. If you have a JPG logo with a white box around it, AI removers work exceptionally well because the edges are hard and defined. However, for the crispest professional results, you should always try to locate the original Vector (SVG) or EPS file of the logo.
3. What is the best tool for removing backgrounds from hair or fur? You need a tool that specializes in "Image Matting." As of 2026, Adobe’s Firefly engine and specialized algorithms in tools like Remove.bg are trained specifically to detect individual strands of hair. Avoid basic "magic wand" tools in older software; they'll just give you "helmet hair."
4. How do I make a background transparent in Paint or basic tools? Newer versions of Microsoft Paint (Windows 11 and later) now include a one-click background removal button. However, for older legacy versions of Paint, creating true transparency is a nightmare and often results in jagged edges. We strongly recommend using a browser-based AI tool instead for a cleaner result.
5. Is it safe to upload private photos to online background removers? Exercise caution. Read the privacy policy before uploading. Trusted platforms like Canva and Adobe have strict data protection standards. However, avoid uploading sensitive documents (like driver's licenses) or compromising personal photos to unknown, ad-heavy "free" websites, as they may store your images for training data.


